
If you’re wondering what you’re going to do about your gel nails while in lockdown, wonder no more.
[Reading time: 7 mins]
Granted, not being able to get to the salon to get your nails done isn’t exactly the biggest of hardships, but anything that has a feel-good factor right now is beneficial to your well-being.
I did my own gel nails last week – after a few weeks of having nothing on them at all – and it definitely made me feel better. This post will hopefully go some way to showing you that doing your own gel nails is super easy, doesn’t take up much time AT ALL (though if you’re looking for things to fill your time you can eek it out as much as you need/want to) and isn’t anywhere near as expensive as you might think.
A couple of years ago I started going to my niece for gel nails as well as eyelash extensions. I haven’t had my lashes done in about a year in a bid to improve the condition of my natural lashes, but at the time I was getting extensions done regularly… there’s no substitute for eyelash extensions. You have to have them done by someone who knows what they’re doing.
But gel nails? After having my niece do them once I realised that I could easily do them myself at home once I’d bought the basics. It’d also be TONS cheaper than going to a salon.
Disclosure: This blog uses affiliate links (at no cost to you). Full disclosure
Okay, but how easy is it to do your own gel nails?
I really mean this: if you’re okay at painting ordinary nail polish, you’ll be fine at doing your own gel nails. I PROMISE. As long as you follow a few basic steps there’s no real skill involved (apart from painting neatly). However, after mentioning gel nails in my last post about beauty products I love, someone kindly left me a comment with a simple suggestion about how they do their own gel nails – and I was converted on the spot.
First of all: I don’t want to assume that everyone reading knows exactly what gel nails are. Before my niece did my nails I didn’t really know what they were, apart from the fact that they lasted a long time without chipping.
Basically it’s a special type of polish that has to be painted on and then “cured” under a UV lamp (only for 30-60 seconds or so for each layer). You have a base coat, colour coat and top coat like standard polish. Once the polish is cured it needs no drying time – it’s totally dry and you’re good to go. It’ll last for at least two weeks, and you’ll find that separation regrowth at the nail base will occur before the polish starts chipping (if the nails have been painted properly).
The only downside is that the polish isn’t easy to remove… that stuff is welded on. You can’t just get a gel nail polish remover (which you DO need) and just wipe it off – the polish has to be soaked off.
What you DON’T want to do is to scrape, pick at or peel the polish because this is what damages your nails. But do not fear, I’ve included details of how to get it off with minimum fuss and with minimum damage to your real nails.
A great trick for doing gel nails
If, like me, you always thought you didn’t want to be “committed” to one colour polish for two weeks, then this is for you. You CAN paint any standard polish over the top of gel polish and then remove it with an acetone-free polish remover to avoid harming the gel, but it doesn’t allow you to (easily) switch between, for example, black nails and nude/natural nails.
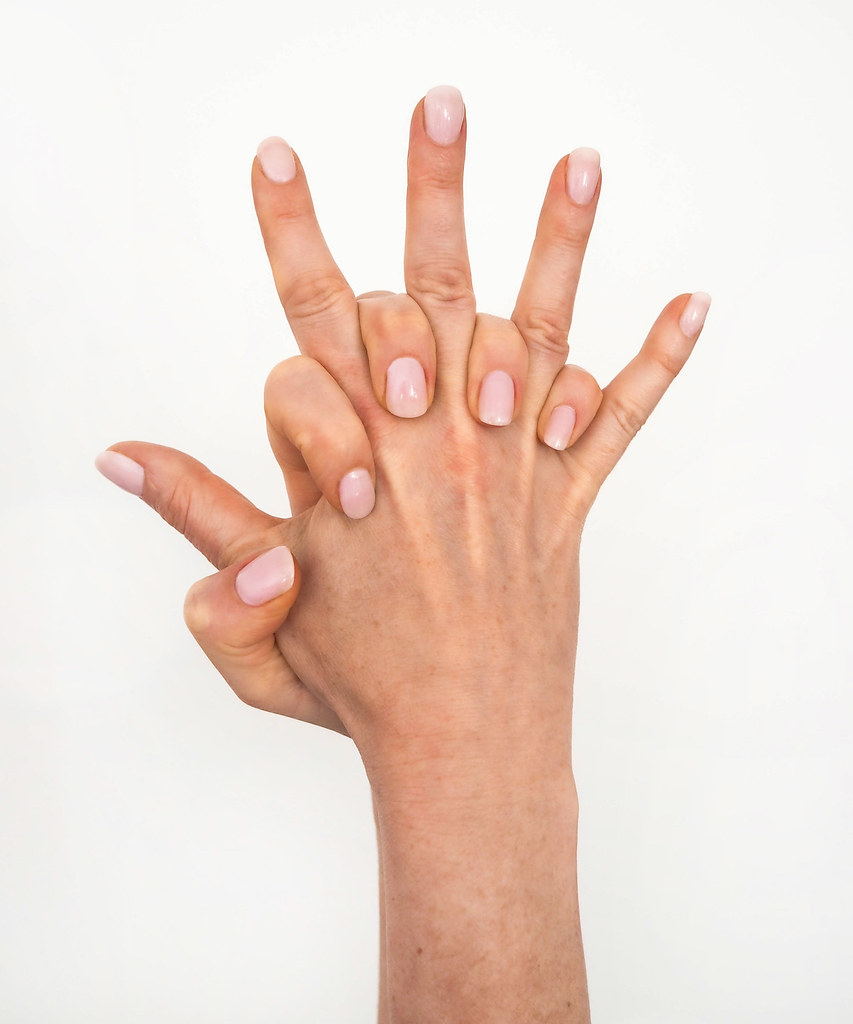
The way I now do my gel nails is like this: I merely paint a layer of clear base coat, then two clear top coats. It gives me beautiful looking, hard-wearing, protected nails WITHOUT the commitment of any one colour. Then I simply paint a standard colour over the top (if I feel like it) and remove with the acetone-free polish remover to go back to totally natural (but glossy) gel polish nails. Or I just paint them a different colour.
During the time the gel nail polish is on, my nails are well-protected. They don’t go soft, bend or break as easily. And as long as you remove the polish carefully [properly] you won’t damage your nails. It’ll make them stronger.
So what do you need for doing your own gel nails at home?
Everything you need for doing your own gel nails at home
This list might seem like a lot but it isn’t really. I’ll share a quick how-to guide after I’ve listed the products you need. Feel free to do your own research on essentials to buy (or different brands), but these are here to give you an idea of what you need to get yourself started.
The basics to paint your own gel nails are:
1. Nail files and buffer
2. Gel polish base and top coat
3. Gel polish colours (optional)
4. UV LED lamp
5. Acetone-free nail polish remover
And to remove the polish:
6. Gel polish remover
7. Remover kit
1. Nail files and buffer
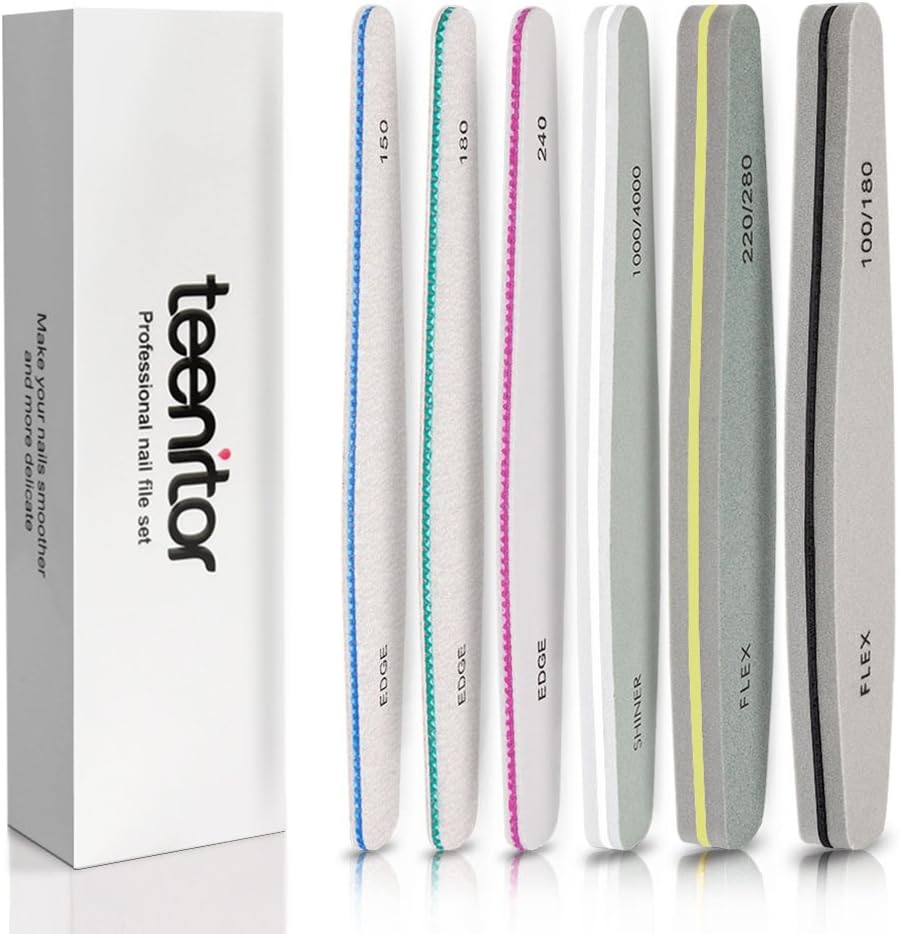
Above: Teenitor gel nail file set
I’m assuming you have files already, but if you don’t have a buffer then you will need to get one.
2. Gel polish base and top coat
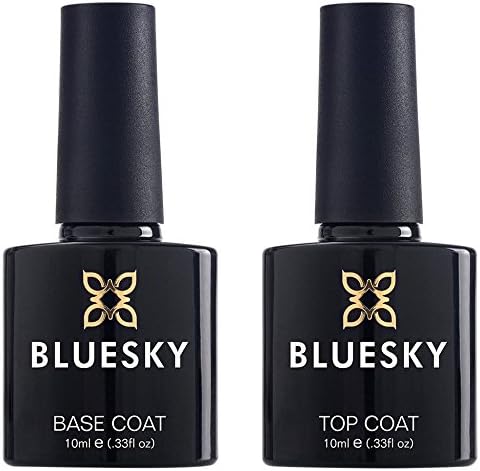
Above: Bluesky base and top coat gel nail polish set
At the least you’ll need top coat and base coat. My niece recommends BlueSky brand and I can vouch for them being really good. They’re also vegan and cruelty-free.
3. Gel nail polish colours (optional)
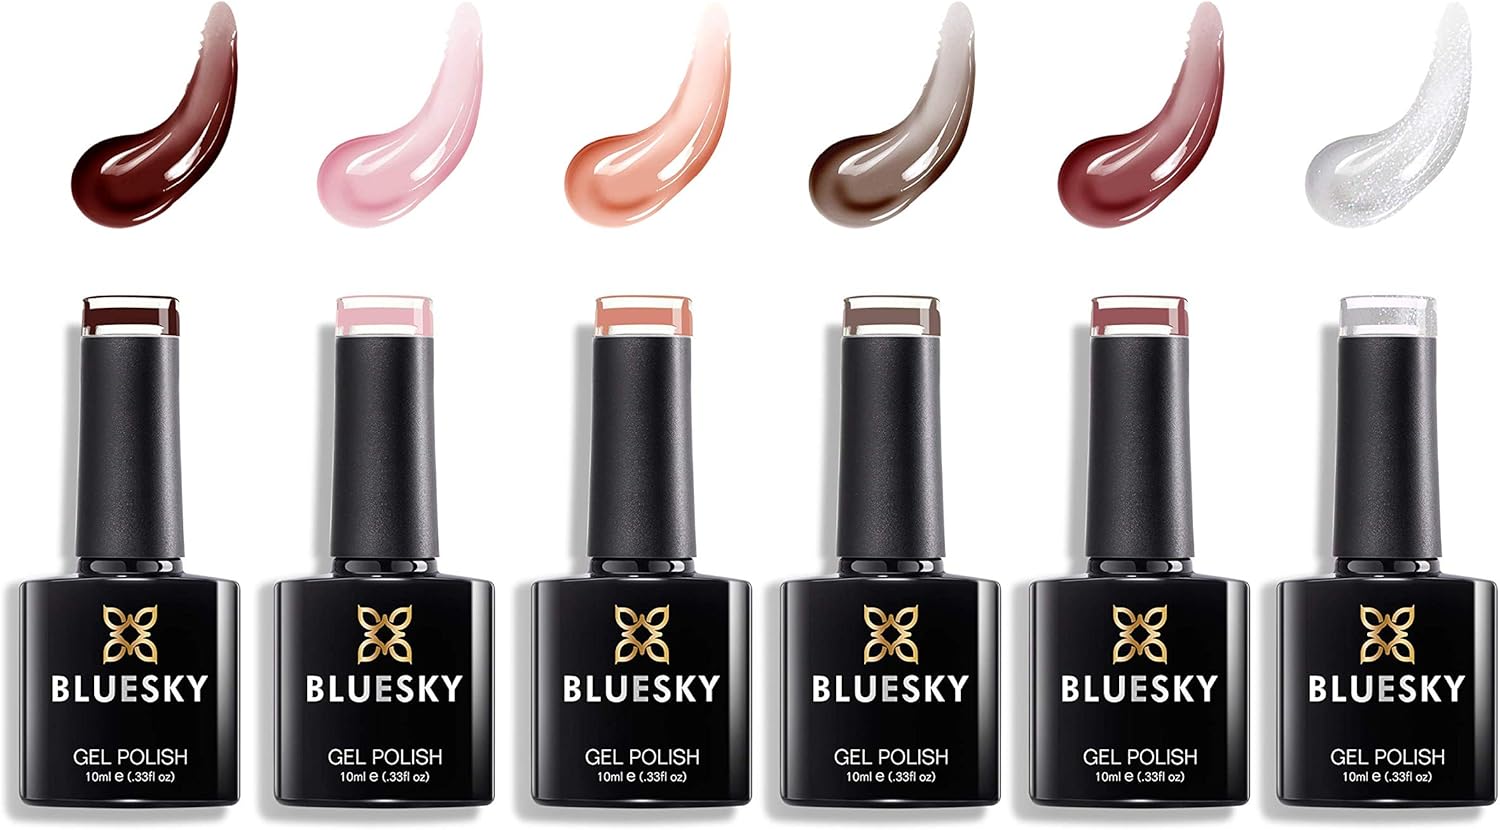
Above: Bluesky set of 6 gel nail polishes in nudes and browns (or you could go for a single bottle of classic red, black or pinkish nude)
If you go for my method of only doing base and top coat with gel polish then you don’t necessarily need gel polish colours, but when they’re an average of only £7 each then why not get a couple of colours anyway?
4. UV LED lamp
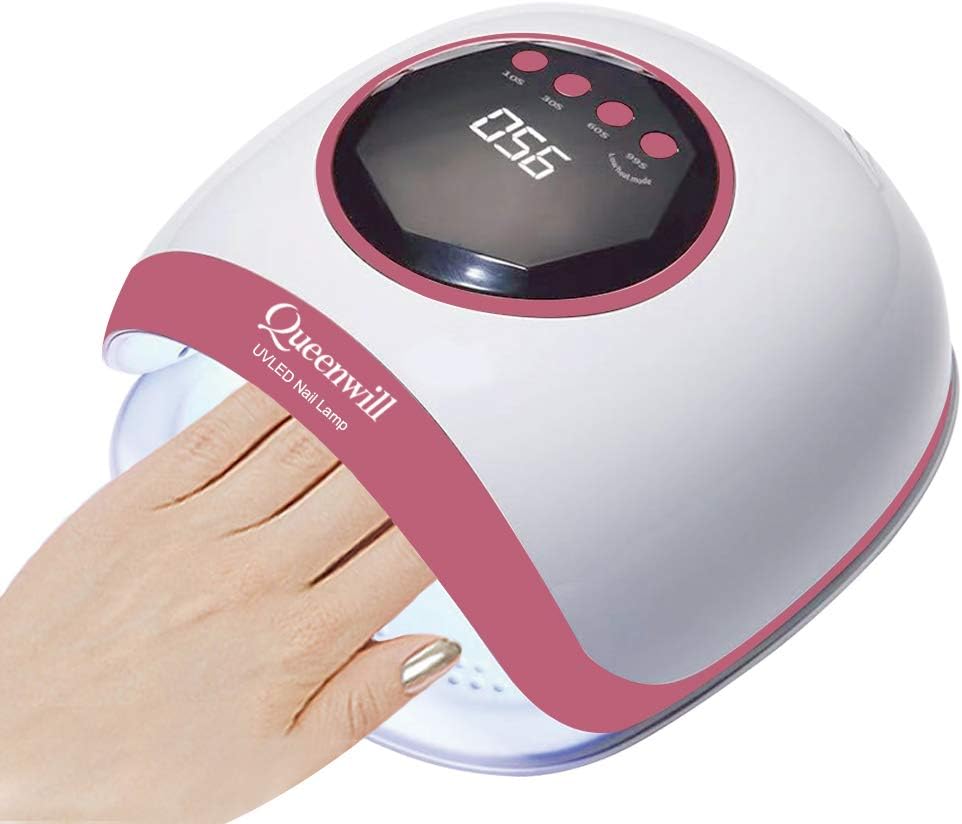
Above: UV LED gel nail lamp with timer setting (Amazon’s choice)
There are loads on the market so the choice is pretty much endless. My best tip is to get one that your whole hand fits into – I mistakenly went for a “half” lamp so I have to cure my fingers and thumbs under the lamp separately. The smaller lamps like mine are a lot cheaper, but if you can go for the bigger one then I think it’s worth the extra just for the convenience. Make sure it also has a timer so you can easily time the curing process.
5. Acetone-free nail polish remover and
6. Gel polish remover
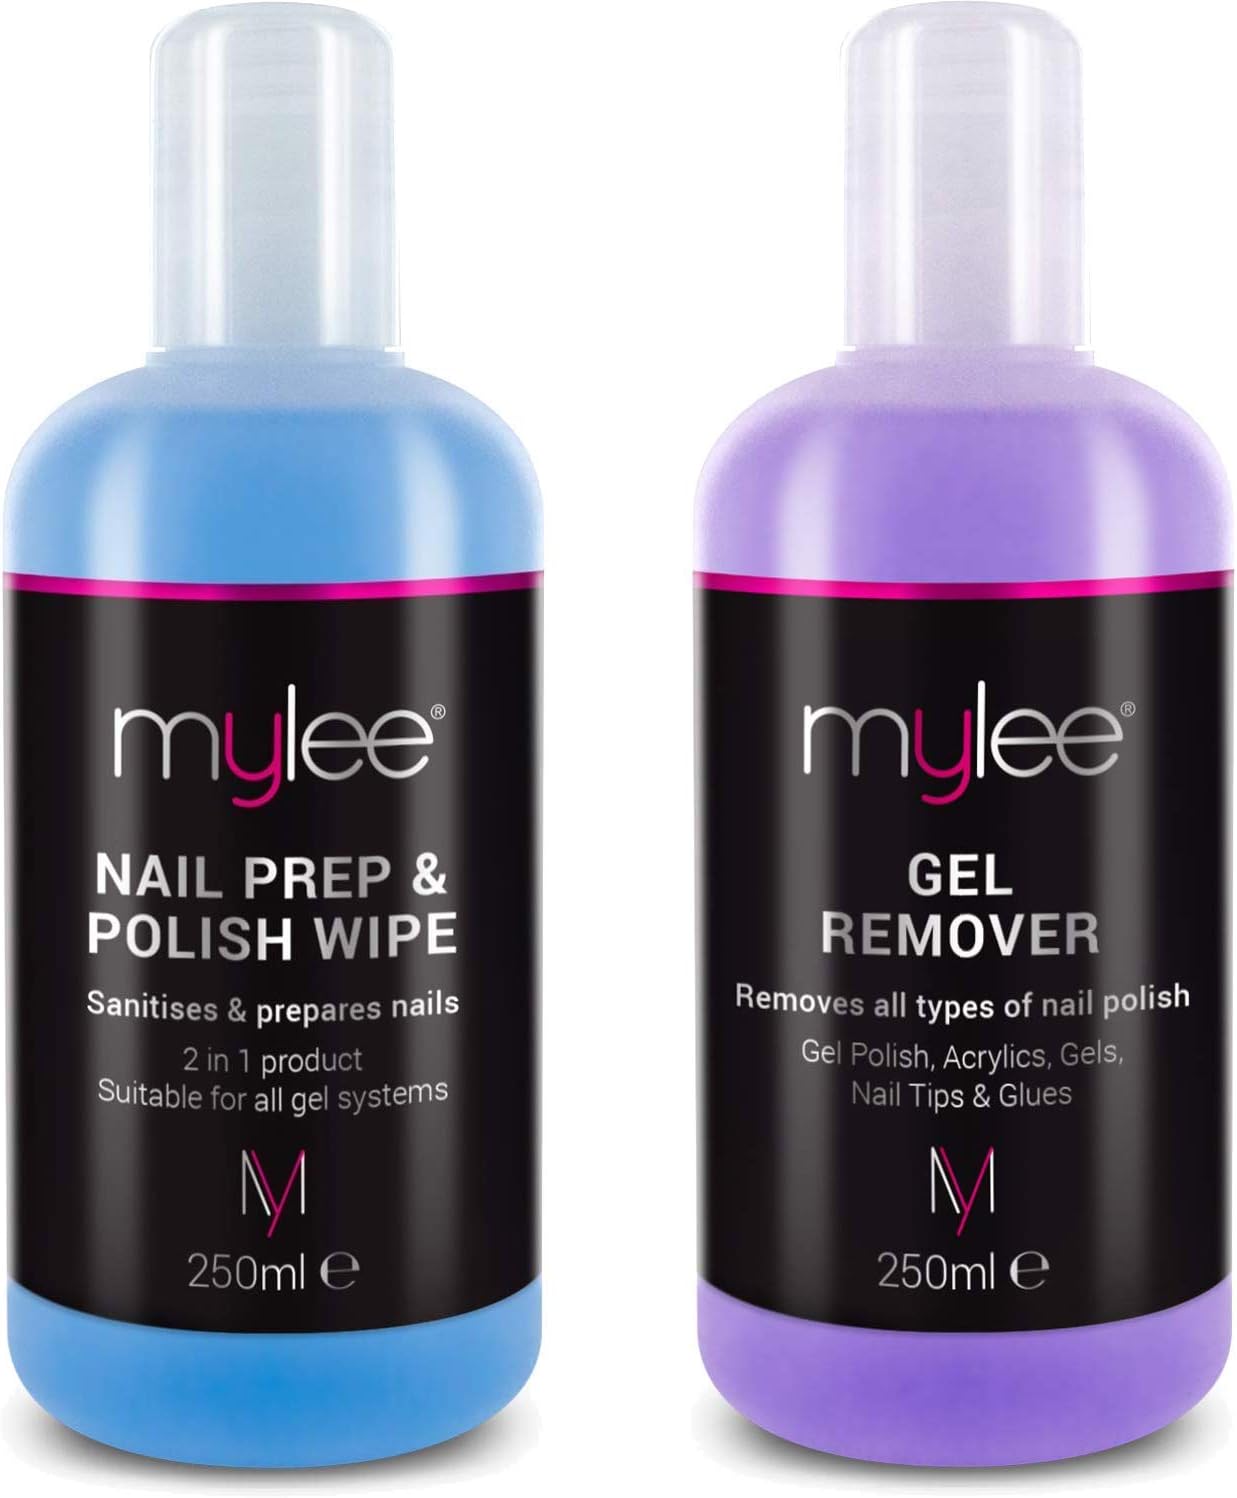
Above: Nail gel polish prep wipe & remover set
I’ve put these two together as this set looks good value for money and has great reviews. (You can buy them separately at places like Boots or Superdrug or even supermarkets – I know Tesco sells gel polish remover – but during the coronavirus pandemic they seems to be regularly out of stock.)
The “nail prep and polish wipe” bottle is the equivalent of acetone-free remover for both a final wipe after the nail curing process and for removing standard nail polish you’ve added on top of gel polish. The gel remover does what it says on the tin. You can also buy little packets of wipes, but I prefer a bottle of acetone-free polish remover so I don’t create lots of waste with individual wipe packets.
7. Remover kit
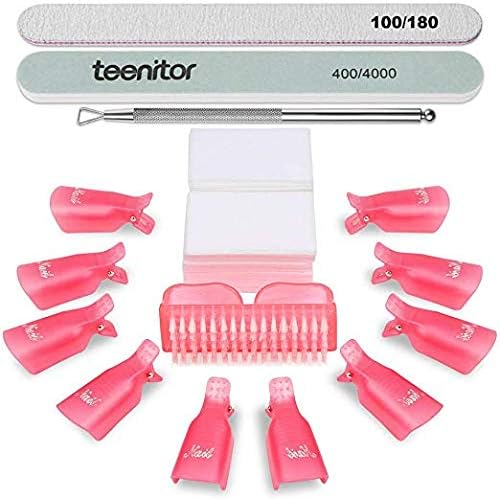
Above: Nail gel remover tools kit
Finally – a gel polish remover kit. At the very least you’ll definitely need a metal tool (as shown in the kit above) to take the polish off once you’ve soaked your nails. It’s the best thing to get the polish off cleanly without causing damage. I have a remover set like this myself with the plastic clips, but wrapping your nails in silver foil does the job just as well. The brush, wipes, files, etc. are all things you might have already or feel you don’t need – you can buy the metal tool just by itself if you’d prefer.
✷ ✷ ✷ ✷ ✷

A quick guide to applying gel nail polish
As I already mentioned, applying gel polish isn’t difficult, you’ve just got to remember a few simple steps. The actual application isn’t any different to applying standard nail polish. So if you’re no good at painting your nails neatly by yourself, maybe this isn’t for you! You can always get someone else to apply it for you (though if you’re in lockdown and you live with a cat and/or someone who doesn’t know one end of a nail file from the other, maybe it’s time to practice)…
Tips: I always do all of one hand first and then all of the other hand. Unlike standard polish it doesn’t need time to dry between layers, so doing all of one hand is more practical (and less confusing) when you’re doing your own nails.
- Prep your nails as you would normally. Make sure they’re clean and free of “nail dust” and moisturiser.
- Buff the nails lightly so that the gel nail polish has a little grip.
- Paint a layer of base coat onto the nails, making sure to apply a little to the nail edges and avoid painting the cuticle.
- Cure under the UV lamp for 60 seconds*.
- Optional: paint a layer of your chosen gel nail polish colour (don’t forget the nail edges) and cure for 30 seconds*. Repeat. (Again, do not let the polish seep into the cuticle.)
- Paint a layer of top coat (don’t forget the nail edges) and cure for 30 seconds*. Repeat if you want extra protection.
- Using either your special wipes or acetone-free polish nail remover-soaked cotton wool, wipe the sticky residue off your nails.
- Repeat on the other hand.
- Wash your hands thoroughly, apply a good layer of moisturiser and rub cuticle oil into the cuticles.
*or the length of time recommended by the polish manufacturer
That’s it – your nails are completely dry and ready for everyday tasks!
A quick guide to removing gel nail polish
- After washing your hands (preferably soaking them for a few minutes), gently push back your cuticles to separate them from the gel polish.
- Buff your nails – just to remove the top shine – using a coarse 100-180 grit nail file to help the polish soaking process.
- File your nails gently to remove the polish on the edges.
- Soak cotton wool balls or fluffed-up pads in gel polish remover and put in place to completely cover your nails.
- Wrap your nails tightly in foil squares or use the clips to keep the cotton wool in place.
- After 15 minutes, take one pad off and see if the polish will come off easily with the metal tool. If not, leave on for another 5 minutes.
- Take all the pads off and use the metal tool to gently remove the polish from your nails.
- Gently buff your nails, wash your hands and use a cuticle oil to replenish the lost moisture and feed the cuticles.
By following this removal method you shouldn’t find that your nails suffer or become paper-thin. In fact, your nails should much stronger because the gel allows them to grow without any risk of softening, bending or breaking. A light buffing in between applications is all that’s ever needed.
And don’t forget – if you want to use the base and top coat-only method (like I do), then you can apply any standard polish colour over the top BUT! you must make sure you use an acetone-free nail polish remover to remove the standard polish.
Good luck – remember it sounds like a lot of kit but in the long run it’s a LOT cheaper than going to the salon all the time. Plus you can switch up the colour any time you wish and don’t have to leave the house to have it removed and reapplied.
Perfect for lockdown, no…?!
Are you a gel polish addict? Do you think you might try this at home? Comment below…!
Stay home, stay safe XOXO

Pin for later!


I’ve always had long nails, but until recently, they weren’t my own. I started with Lee Press-On Nails (remember those), moved on to glue-on’s, acrylics, and gels. Then I discovered Biotin. Thanks to which, my own nails went from weak and brittle to being as hard as diamonds! I get my Biotin from Amazon, where the 100,000 mcg dose is available; the best Walmart can do is 10,000 mcg. I’ve had them at what would be the Lee Press-On Nails glamour length, I could have grown them longer, but today I keep them at the Lee Press-On Nails active length. Anyone wanting to try this should not expect to see immediate results. Once on Biotin, the nail has to grow completely out, from the cuticle to the free edge. ,
I do the base coat and top coat gel thing as well and then put regular polish on top. Lasts so much longer and I can change it weekly. I relive the gel less frequently too because the regrowth isn’t so obvious. Aren’t we smart!!
Author
We’re VERY smart, Hilary!! heehee 😉
I’ve invested in a steam gel remover, its amazing, I’d really recommend it .
Author
I did think about getting one at one point, Susan – good to hear they work well!
I haven’t manicured my nails or worn nail polish for such a long time. I’ve heard
the girls in the office talking about gel nail polish, and what you need. I do prefer
your idea of a base and top coat – then just applying nail varnish, this is because
I received a lovely gift of a very posh nail varnish set for Christmas from a dear
friend. This way I’ll be able to use them. Thank you for this as I didn’t
have a clue what gel nail polish was and how to use. Love the natural look on
your nails.
Alison xx
Author
As I have so many nail polishes (non-gel) I love the clear layers only, Alison – it works a treat! And even when there’s no coloured polish on the clear gel makes them incredibly shiny and glossy and of course protects them. Let me know if you decide to go for it! x
Ok….I’m going to see about buying all the kit now I’ve read this! You make it sound so easy. Over here in Portugal, I tend to avoid gel nails because they literally use an electric sander (for want of a better word!!) to remove the polish….taking god knows how many layers of nail with it, thus leaving my poor nails weaker than ever!!! Your way sounds like the perfect solution.
Thanks Catherine!
Hugs
Suzy xx
Author
Ughhhh those sander things are AWFUL, Suzy… at the Olia ad shoot in Prague last year I had my nails done by a manicurist who didn’t speak a word of English so I didn’t know what she was doing (and couldn’t ask as we were just left alone) – she took off my gel with one of those sanders (I’d only ever soaked mine so didn’t know that’s what she was doing) and basically she totally and utterly f****d up my nails just as they were getting really long and strong. In fact it’s taken till the beginning of this year for them to get back to a decent condition – that’s nearly 12 months!!
Anyway YES, I totally recommend doing them yourself. The kit is a lot to splash out on initially but it’s sooooo worth it. Strong nails ARE possible with gel polish! x
I have Blue Sky and have a huge selection to choose from I have been going to the salon – just because it’s a real treat. My daughter has just qualified so has done them once – then we had lock-down!!!! I haven’t had any polish on recently, then I’ve used a 60 second Rimmel polish which lasted a few days, so I will maybe try my gel kit again, but the lamp isn’t too good. Thanks for sharing Catherine, it’s so nice to get dressed up with makeup and nails done, i did so today and felt quite good. Take care and stay safe Hun. Jacqui x
Author
Maybe just get a new lamp, Jacqui – it’d be so worth it, especially if you have lots of Bluesky colours already! Take care yourself, thank you x
I am impressed Catherine. And I wish I’d been painting my nails all along. Painted nails do definitely look nicer, and I suspect it makes one look after their hands better. Do you also paint your toe nails like this? The last time I had my toes done professionally, the maicurist was extremely efficient and enthusiastic, meaning she did everything too hard. I haven’t been back.
Author
Hi Ratnamurti – no I don’t do my toes with gel polish as I find they never ever chip with standard polish… I guess because they don’t “do” stuff like your hands do?! I find I have to take polish off my toes because the cuticles have grown away from the polish before they ever chip!
Sounds like manicurists are very unforgiving when it comes to doing clients’ nails if my story recounted to Suzy (above) – and hers – are anything to go by! I’m thinking we should do gel nails at home anyway if these horror stories happen to many people 🙁
I used to use Blue Sky all the time. You can get any colour desirable from them. I love the natural colour/look though.
Author
I have a TON of colours by Bluesky, Laurie – that’s the trouble when they do every colour under the sun as you say!
I’m loving the natural colour nails too, though when they’re a tiny bit longer I’ll be onto the classic red 😉