It’s finally here – the last part of my mini series on how to give your blog a DIY makeover! So if you’ve been following along, you may have done some (or all!) of the following:
Part One:
- Created a test blog
- Sorted out a great header
- Decided on layout
- Created an interesting About page
- Decided on a colour scheme
- Made all your photos the same width
In this one (Part Three) I’ll be covering:
- Follow buttons
- Adding extra pages
- Streamlining and decluttering
- Getting feedback
- Transferring the design to your actual blog (the scary bit!)
Final push… here goes!
1. Make your follow (social media) buttons clear
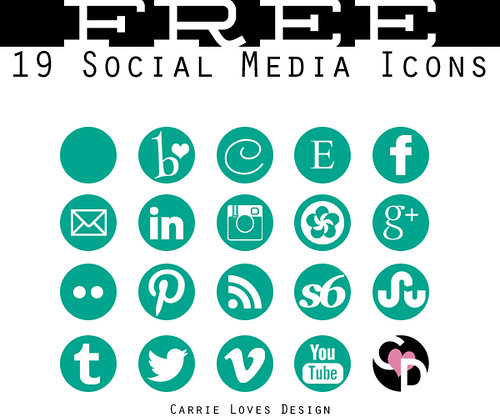
Either upload icons for your social media platforms or design your own (using the same font as your header) so you can be followed easily. If you Google “free social media icons” you will get a never-ending choice of ones to choose from – but make sure you choose something that fits the style of your new blog design. If you have a sleek, minimalist design in black and white, for example, I’d advise you to steer clear of ones that have a crafty or hand-drawn feel to them.
I won’t go into how to upload them here when so many other bloggers have explained it so well – here is a great tutorial on how to upload them with the correct links:
http://www.craftiments.com/2012/08/how-to-add-custom-social-media-buttons.html
Don’t want to trawl the web and just require plain, no-nonsense icons (as below) with a choice of colours and tutorials all in one place? I’ve found this post for you that does exactly that (with 30 colours to choose from!):
http://www.carrieloves.com/2012/12/free-social-media-icons-updated/
The other choice is to use the font from your header or similar to create buttons with words, not icons (as I have done on mine)*. Two other blogs that have follow buttons this way are Atlantic-Pacific (same font as her header) and Keiko Lynn (different font but the design complements her header). To have these on your blog, you will need to create the images in Photoshop or some sort of editing software. This is where your test blog can help!
*Update 22/07/2013: These have since been changed to social media icons.
I use my test blog to create the HTML for all sorts of things: in a new post, simply upload images and create links as if you’re just writing another post. Copy and paste the HTML that the post produces, and voilà!
Step-by-step of how to create images with links for your sidebars:
- Create the images – one for each social media platform – and upload them to your image hosting website
- Open a new post in your test blog and insert the images to the size you want them to appear
- Create links for each image to your relevant social media platform page – *but this is important* – remember to select “open in new window” for each link (unless you want visitors to leave your blog)
- Publish the post to your test blog (remember no-one can see it as you will already have made the blog not visible on the web) and check that the links work
- Go back to editing the post and copy the HTML code
- Add an HTML code widget to your side bar (or wherever you want the links to appear) and paste in the HTML
- Now arrange the widget so that it appears near the top of your blog (you don’t want visitors to have to go scrolling down for your follow buttons)… that’s it!
2. Add extra pages
This is optional. However, it is often very helpful to have extra pages that give the visitor more information about the blog, not just “Home” and “About”. I have to admit I do lose interest very quickly when visiting a new blog that has no extra pages apart from those two (my interest wanes even more quickly if there’s no About page)! Personally, I think a blog becomes far more interesting/intriguing if it includes one or two pages that give more of an insight into the types of things that the blogger writes about.
The pages on my blog that I hope give more of an insight into what I write about are: Shop My Look, Musings and PhotoTips – all giving the reader more of an idea of what I’m all about. Think about what you write about a lot and consider extra pages to cover just those topics.
3. Streamline the elements and declutter
Once you’ve got everything you think you need on the test blog, consider simplifying everything and paring it down as much as possible. Does it look cluttered? Are there unnecessary widgets that you could really do without? The easier your blog is to navigate, the easier it will be for visitors to see where they need to go. I probably need to do the same on my own blog – it’s a task that always requires my attention.
Likewise, don’t make it too simple! Ensure visitors can easily find the links to your social media platforms, can access your archives easily and aren’t disinterested quickly due to acres of blank space – keep them engaged.
If in doubt, keep it sleek and simple – but not dull. Make it classy, not cluttered.
4. Get feedback on your new design
Finally, once you think you’re pretty much there, I think it’s a good idea to get feedback on your test blog. Send the URL to two or three other bloggers you know quite well – ask for their feedback on your design before unleashing on to the world. Ask if they find anything unclear, difficult to navigate or not pleasing to the eye. Choose your critic wisely as you want an objective point of view, not someone who will automatically gush over anything you send them.
If you can, check the design on different monitor screens, tablets and mobiles to see how it appears to others. It will be very different depending on the device/screen used to view it.
I’d be more than happy to review a test blog if anyone wanted me to – it makes sense if I’m dishing out all this advice! Depending on how many I receive (could be loads, could be none!), please bear with me for a response. Email your URL to: notdressedaslamb(at)gmail(dot)com. I’ll be as honest and constructive as I can.
5. Transfer the HTML from the test blog to the real blog
When you’re totally happy with the whole design, it’s time to transfer the HTML of the test blog to the new blog.
BUT! As a precaution, it’s very important that you do this first:
On your real blog, go to where you would amend the HTML of the entire blog (in Blogger, go to Template > Edit HTML). Save a copy of your blog’s current HTML so that if something doesn’t work when you transfer the new design, you can quickly revert back to the existing template.
Got that saved? Now here’s the exciting part – but don’t do this until you are 100% satisfied you have the right design!
I think it’s a good idea to transfer the design when traffic to your blog is at its quietest – your stats should show what time of day this is. As you will almost certainly have to reinstall the gadgets and header (these may not automatically be transferred with the HTML code), you want the least amount of visitors to see your blog while you add the finishing touches.
To transfer the new design:
- Make yourself a strong cup of tea/coffee and ensure you won’t be interrupted for at least an hour. This process needs your undivided attention, and you don’t want to leave it halfway through.
- In your test blog, go the Edit HTML part and copy the code.
- Go to the same section of your REAL blog, and (take a deep breath) delete the old HTML code and paste in the new one.
- Save it – and you should have the new design all transferred over.
- Stay calm at this point!
- Get to work on the widgets. Work between the test blog and real blog to ensure you add the same widgets in the same places. Keep viewing your blog to make sure it’s looking the way it should.
- Once this is all done – pour yourself something stronger and breathe a sigh of relief… don’t have a meltdown like I did! It’s not the end of the world if the design is a bit all over the place for a short while.
That’s it! You’re done!!! *big round of applause and pat on your own back*
…………………………………………………………………………………………………………………………
Want some links?
I’ve collated some extra reading that you may want to look at, all to do with redesign.
Colour, font, photos, layout, tweaking:
http://www.nakedblogging.com/
Blog header tips:
http://heartifb.com/2012/11/29/design-that-shines-10-tips-for-a-dynamic-blog-header/
And if you’ve found it all too stressful and decided that it’s a job for the professionals after all, you could simply buy a ready-made template – all the hard work is done for you!
Buy ready-made themes for Blogger:
http://www.designerblogs.com/
Buy ready-made themes for WordPress:
Or go to etsy.com and search for “premade blogger/wordpress templates” – there are lots of lovely designs there.
…………………………………………………………………………………………………………………………
I hope this series has been of help to you if you’ve been following along! Do leave links to your new designs in the comments if you’d like us all to see the results of your hard work, or email me as mentioned above if you want some design feedback.
Hope you all have a great weekend – come back tomorrow for a round up of my favourite winter season outfits!


Thanks a lot share with me this excellent post ? I agree with your views and ideas nice post..
I have REALLY appreciated the blog tip series! I have looked at blogs I follow to see what it is I like about them, but sometimes it's not glaringly obvious. :o) I have added some more pages and I already like that tiny change to my blog. I am still working on photo sizing…my first attempt I must have bungled the math somehow, but I'll try again. Until then, I just try to use all vertical photos. :o) If you have any suggestions for improvement on my blog, I'm open to suggestions.
http://www.dressupnotdown.blogspot.com
Hi Catherine, I wanted to be able to sit down and read this post when I knew I had ample time. You did no disappoint! Thank you so much for taking the time with this series Catherine. And step #5 is critical. I have been playing in my test blog, but of course, the transferring over to my blog is went the panic begins! With these concise tips, all will be fine.
Sue xo
Great post! I'm going to try the follow buttons.
Mo
I love all the cute icons people create! I wish I were better at graphic design to do my own, but I'll take the cute freebie ones. 🙂 Great post! <3
toni
Great post! And design 😉 Xo Megan, http://www.TfDiaries.com